 Try lt Free
 Recovery success rate of up to
External hard drives have become essential tools for personal and professional data storage, allowing users to back up files, transfer data between systems, and expand available storage space. Over time, however, users may encounter situations where an external drive becomes cluttered, develops file system issues, or needs to be converted to a different format for compatibility with other devices. In such cases, reformatting the external hard drive is often the most effective solution.
Reformatting involves erasing all existing data and creating a new file system on the drive. While this process is relatively straightforward, it’s important to approach it with care, particularly to avoid accidental data loss.
Chapter 1: Why Reformat an External Hard Drive?
Before diving into the reformatting process, it’s useful to understand why someone might need to reformat their external hard drive in the first place. Here are the most common reasons:
1.1 File System Compatibility
Different devices and operating systems support different file systems. For instance:
NTFS is best for Windows-only use.
exFAT supports both Windows and macOS with fewer limitations.
FAT32 is widely compatible but has file size and volume limitations.
If you’re planning to use your external drive across multiple platforms, choosing the right file system is key.
1.2 Performance Issues
An overloaded or fragmented file system can slow down drive performance. Reformatting can give your external drive a clean slate, potentially improving speed and stability.
1.3 Corrupted File System
Power failures, improper ejections, or malware infections can corrupt your external hard drive. Reformatting is often the most straightforward solution to fix logical errors.
1.4 Repartitioning
If you’ve previously partitioned your drive and now want a single volume or different structure, reformatting and repartitioning will help you achieve that.
1.5 Preparing for Sale or Transfer
If you’re giving away or selling the drive, reformatting ensures that your personal data is erased.
Chapter 2: Backup Before You Format
Formatting will delete all data on the external hard drive. It’s crucial to back up any important files before proceeding.
2.1 How to Back Up Your Data
You can back up your data using:
Manual transfer: Copy files to another drive or cloud storage.
Backup software: Use tools like Windows Backup and Restore, Macrium Reflect, or third-party apps.
Cloud storage: Services like Google Drive, OneDrive, or Dropbox offer reliable cloud backup options.
Make sure the backup is complete and verified before you proceed to format your drive.
Chapter 3: Understanding File System Options
When reformatting, choosing the right file system is important. Here’s a breakdown of the major file system types:
3.1 NTFS (New Technology File System)
Best for: Windows users
Pros: Supports large files, file permissions, compression, and encryption
Cons: Not fully compatible with macOS and Linux without third-party software
3.2 exFAT (Extended File Allocation Table)
Best for: Cross-platform use (Windows and macOS)
Pros: Supports large files, no journaling (better for flash memory)
Cons: Lacks advanced features like file permissions
3.3 FAT32 (File Allocation Table 32)
Best for: Maximum compatibility across devices
Pros: Compatible with most operating systems and older devices
Cons: File size limit of 4 GB, volume limit of 32 GB on Windows
Chapter 4: Method 1 – Formatting Using File Explorer
The simplest way to reformat an external hard drive on Windows 10 is through File Explorer.
4.1 Steps
Connect your external hard drive to the computer.
Open File Explorer (Windows + E).
Locate your external drive under This PC.
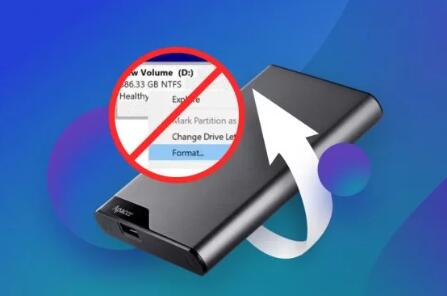
Right-click the drive and select Format.
In the Format dialog box:
File system: Choose NTFS, exFAT, or FAT32.
Allocation unit size: Leave as default unless you have specific needs.
Volume label: Name your drive (optional).
Quick Format: Check this for faster formatting (unchecked for deep format).
Click Start.
Confirm when prompted that you want to erase all data.
4.2 Pros and Cons
Pros: Fast and easy
Cons: Limited customization
Chapter 5: Method 2 – Using Disk Management
Disk Management offers more control, especially if you need to delete or create partitions.
5.1 Steps
Press Windows + X and select Disk Management.
Find your external drive in the list.
Right-click the volume and select Format.
Choose file system, allocation size, and volume label.
Optionally delete and recreate the partition by right-clicking and choosing Delete Volume, then New Simple Volume.
Follow the wizard to assign a drive letter and format.
5.2 When to Use Disk Management
Repartitioning the drive
Troubleshooting formatting errors
Assigning or changing drive letters
Chapter 6: Method 3 – Using Command Prompt (Diskpart)
Advanced users may prefer formatting using the Command Prompt.
6.1 Warning
Be extremely careful—Diskpart commands can permanently erase drives.
6.2 Steps
Type cmd in the Start menu, right-click Command Prompt, and select Run as administrator.
Type diskpart and press Enter.
Type list disk to show all connected disks.
Identify your external drive (based on size) and type select disk X (replace X with your disk number).
Type clean (this deletes all partitions).
Type create partition primary.
Type format fs=ntfs quick (or replace ntfs with exfat or fat32).
Type assign to assign a drive letter.
6.3 Pros and Cons
Pros: Powerful and flexible
Cons: High risk of error
Chapter 7: Common Errors and Fixes
Sometimes formatting fails. Here are common errors and how to fix them:
7.1 “Windows Was Unable to Complete the Format”
Cause: Drive is write-protected or corrupted
Fix:
Use Disk Management to delete and recreate the partition
Use diskpart to clean and format
7.2 “The Format Did Not Complete Successfully”
Cause: Bad sectors or corrupted volume
Fix:
Run chkdsk /f X: (replace X with your drive letter)
Use a deep format via Disk Management
7.3 Write Protection
Cause: Physical switch on the drive or software setting
Fix:
Check for a write protection switch
Use diskpart and type attributes disk clear readonly
Chapter 8: Tips for a Successful Format
8.1 Safely Remove the Drive
Always use “Safely Remove Hardware” before disconnecting the drive to avoid corruption.
8.2 Regular Maintenance
Run chkdsk periodically
Defragment HDDs (not SSDs)
Scan for malware
8.3 Use Naming Conventions
Clear volume labels help differentiate multiple drives.
8.4 File System Best Practices
Use NTFS for Windows-only drives
Use exFAT for cross-platform compatibility
Avoid FAT32 unless necessary
Chapter 9: Formatting External Drives Over 32GB to FAT32
Windows 10 does not allow formatting FAT32 on drives larger than 32 GB through GUI, but here’s how to do it:
9.1 Use PowerShell or Third-Party Tools
Command:
powershell
CopyEdit
format /FS:FAT32 X:
Or use tools like:
GUIFormat (Fat32Formatter)
MiniTool Partition Wizard
EaseUS Partition Master
These tools bypass the FAT32 limitation.
Chapter 10: Third-Party Formatting Tools
If built-in tools don’t meet your needs, consider third-party software:
10.1 MiniTool Partition Wizard
User-friendly
Great for partitioning and formatting
Free version available
10.2 AOMEI Partition Assistant
Supports FAT32 on large drives
Secure erase features
10.3 EaseUS Partition Master
Intuitive interface
Useful for drive cloning and recovery
Chapter 11: Post-Format Considerations
11.1 Restore Your Files
Copy your backup files back to the newly formatted drive.
11.2 Test the Drive
Check that the drive mounts properly and is readable/writeable.
11.3 Check for Bad Sectors
Use tools like CrystalDiskInfo or HD Tune to scan the drive’s health.
Reformatting an external hard drive on Windows 10 is a powerful yet accessible way to resolve storage issues, improve performance, and ensure compatibility across systems. With built-in tools like File Explorer, Disk Management, and Diskpart, users can take control of their external storage devices with confidence.
About us and this blog
Panda Assistant is built on the latest data recovery algorithms, ensuring that no file is too damaged, too lost, or too corrupted to be recovered.
Request a free quote
We believe that data recovery shouldn’t be a daunting task. That’s why we’ve designed Panda Assistant to be as easy to use as it is powerful. With a few clicks, you can initiate a scan, preview recoverable files, and restore your data all within a matter of minutes.


